Dave Taylor has produced templates for the wonderful trucks which I have based my designs off. More information on these can be found on his blog HERE
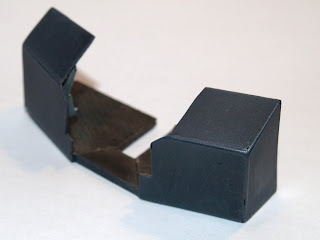
For this part of the tutorial we will be focusing on the forward, gun shield part of the hydra flak guns platform as seen below.
Without gun...
With Gun...
I must note at this point that I have never made templates for any of my scratch builds before, so please be aware that they may not be perfect. I also had to rely on a bit of a poor scan job. I will update the templates as soon as possible with more accurate and clear images. Here they are...for what they are worth...
Promise I will update these ASAP
As you can see above, there is a line which represents an inch, this will hopefully help with scale when they are printed off.
I used .75mm plasticard for the all the components except for the base which I used 1mm plasticard.
The first thing to do is to cut out all the pieces.
First up then, I cut out the components.
Then Starting with the base I build up the first side one piece at a time. I use Revel Contacta professional for this, as it has a fine nozzle for applying glue. I always use poly cement first as it allows a little wiggle room when piecing things together, then add super glue later if you want extra rigidity.
Part two goes on quite easily, however do make sure that you hold the parts together for a tight fit, as any gaps might make part three difficult to fit.
Part three sits on top. This is where a little touch of super glue will come in handy once you have pressed the parts together with the poly cement.
Then its just a matter of repeating in reverse on the other side...
At this point you may find that the joins are a little rough due to the odd angles. For this I simply file down any overlaps. I use a wet and dry sanding sponge, as it is very fine, leaving virtually no visible scratches on the smooth plasticard surface.
Then it is time to add the gun. The Aegis flak gun does need a little bit of prep. I remove some of the lower detail so that the gun shield can simply slot into place around the gun mount. Hopefully you can see where I have done that in the pictures below...
From here you can go nuts with detail. I added part of the Rhino interior and a set of gauges from the Ork Trukk sprue, as well as some textured plasticard for the flooring to mine. Then simply gave the shield a coat of paint.
Next time we will work on the rear platform which is attached to the rear of the gun.
Any questions or comments, particularly if something is unclear or missing, please let me know.


well done, nice looking templates!
ReplyDeleteGlad you like them. I will hopefully be updating them soon with a better quality image.
ReplyDeleteThat's amazing work, mate!
ReplyDelete...And I found it courtesy of Missed Old Stuff!